Monday, June 30, 2008

Windshield...Done !

After six weeks of swapping parts with Factory Five we finally had good windshield supports. Dad came over Sunday and helped me with the install. It took about two hours. Later, Josey helped me assemble and install the wipers. The kit included most of the parts but I had to modify a few things to get an installation I was happy with.

A quick video below...

Now we need a license plate light, reverse light and insurance. Wow, its getting close!

Tuesday, June 3, 2008

Installed Hood and Doors

It's only been a week since I shipped the windshield supports back to Factory Five so I expect another two weeks before the windshield can be installed. However, that didn't slow us down this weekend. After many hours of head scratching and a few mistakes I managed to get the doors and hood alligned. The door hinges move smoothly and the catches are strong and sure.
When you close the doors they click closed and thats it; they don't rattle around or move up and down as they close. I'm really impressed at the adjustment range to get it all right. Don't get me wrong - it's not a heavy steel door like a production car - but for a fiberglass-kit-car-door it feels good!
The hood took a few hours of trimming to get it to sit square in the opening. Then I bungled the rear latch install. I know I can fix it, but, I should have followed the advice on the forum instead of the instructions in the assembly manual. Grrrrr! Sometimes you just have to make a choice and deal with the consequences.
In the first picture you can clearly see the pins at the front of the hood. This way the hood will be removeable. Other people omit the pins and install a hinge at the front of the hood. The hinge provides a clean look but I just love hood pins!
Next - trunk lid install...


Sunday, May 25, 2008

Windshield - Mufflers and Dash Install

Today I built the switch panel below the instrument panel. The red flag is the master battery kill switch - might be handy in a kit car. To the right of it is a 12 volt accessory socket. There are three toggle switches to control the ignition system, fuel pump and cooling fan override. A good friend cut out the switch panel from .067" alluminum at his machine shop; it turned out very nice. It also serves to stiffen up the dash which otherwise has very little support along the bottom. Eventually the top of the transmission tunnel will receive black carpet but I plan to leave the switch panel bare.
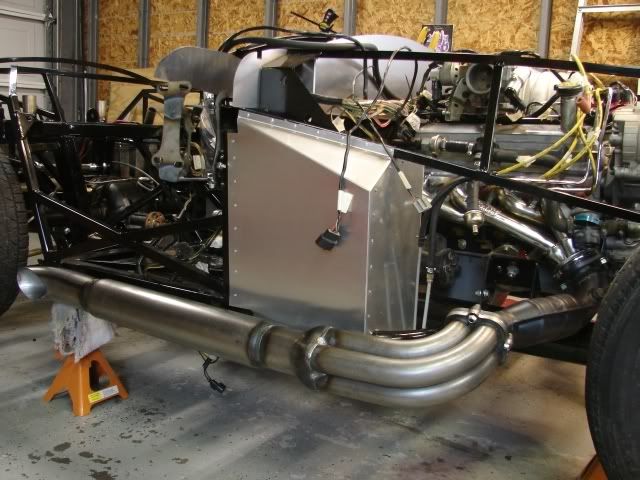
I installed the mufflers last weekend. Took a few hours working by myself. Kym came out later to sign off on my work. She says it'll do.

Dad came over to help install the windshield. I really needed his help. Its a two person job requiring extensive patience. As we drilled the holes in the supports the chrome started peeling off. After a week of disscussions with Factory Five they have agreed to replace the supports. We should have new supports by mid June. So, for now, the windshield is back in the box.
So, whats next? I don't know, maybe the doors and hood. We'll just have to see what I feel like tomorrow.

Monday, May 12, 2008

Starting to look like a car!

Mother's day weekend - took advantage of my brother-in-law, Kevin, to help me lift the body onto the Cobra. Then we secured the body to the frame at the 14 attaching points.

After the family left I started working on some details. As you can see in these pictures I installed the headlights, taillights and signals. The Aston-Lemans gas cap went on as well; I love seeing that on the car, kinda makes it an official race car! After a bit of massaging to the body holes, the roll bar went on.

You can see the quick-jacks at the front and rear of the car. They're still unfinished steel so they will have to come back off for paint or powder coat or whatever. On the original racing Cobras these were used to quickly jack up the car for tire changes. They aren't funcional on my replica so I may just leave them off. Don't know just yet. Lets see how many times I bust my shin on them and then I'll decide.


You don't get to see it in these pictures, but all the lights came on when I flipped the appropriate switches. (That was kinda important, I felt some relief.) The horns even honked. We'll be driving this thing before you know it.

Whats next? Mufflers and windshield. Then the dash. Followed by the hood, doors and trunk. If everything is still going well we get it insured, inspected, and registered!


Sunday, March 16, 2008

Our First Go Cart Ride

Well, this isn't the first go cart ride, but it's close. Ride went well and everything performed as expected. The seats aren't bolted down yet and I would slide back everytime I hit the gas making it difficult to depress the clutch! The seat needs to be a tad higher as well.

What a great feeling! After this ride Kym jumped in and we went for a 2 mile drive around the neighborhood. Kym said, "This isn't legal is it?"

"They have to catch us first", I replied! Ahh, the wind in your hair.

Monday, February 25, 2008

First Start

Started the Cobra today!! First start. Engine came right to life and sounded great. We did find a minor fuel leak - easy to fix, and an oil leak. The oil leak may take a bit of work. I used a kit to relocate the oil filter from the engine block to the frame in front of the engine. The oil is leaking at the adapter on the engine block. I was told this might be a problem so I'm disappointed but not surprised.

There are no mufflers on the car yet - they are being ceramic coated right now. So, first start was just thru the catalytic converters. Sounds pretty good.

Just yesterday I was saying I might have this thing running in a couple more weeks. Then today each little project led to the next and all-of-a-sudden it was ready to start. I couldn't believe it. I kept checking and checking but couldn't find anything else to hook up. The time had arrived. So, I grabbed my neighbor, my son and my wife and dragged 'em all out to the garage. Kym grabbed the camera on the way out (thank you.) What a moment!

I guess the next step is to finish cleaning up the wiring. Most of the "wire diet" is complete (removing unnecessary circuits) so now I just have to tidy things up. Next landmark is the first go-kart ride!

Monday, February 18, 2008

The Trunk Modifications

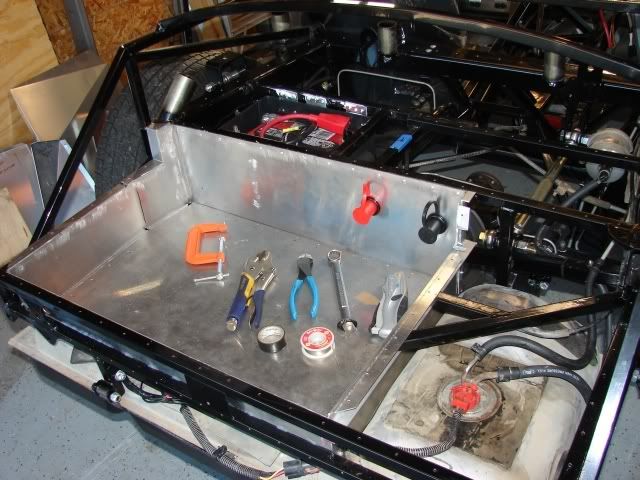
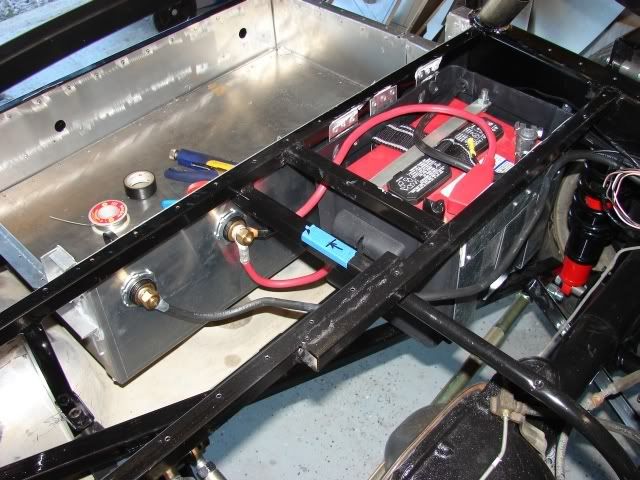
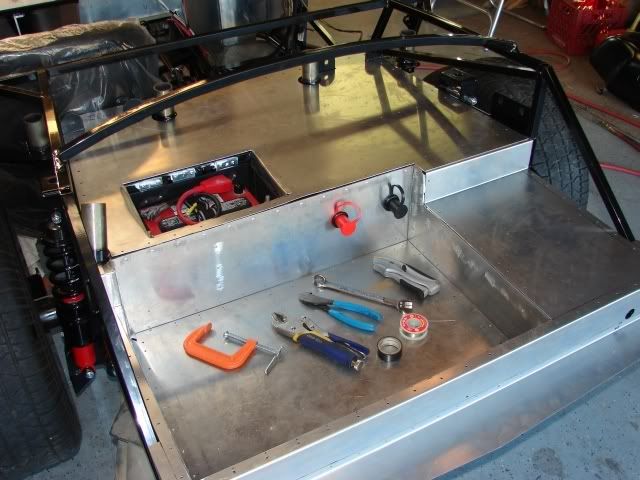
Three modifications can be seen in the above picture. First is the battery relocation. Factory Five instructions call for the battery to sit on the trunk floor (taking up valuable space.) I built a box to "hang" the battery from the trunk floor. Later, a lid will cover the battery compartment.

Also seen are the external battery terminals. Since getting to the battery might be tricky (at night, in a parking lot with a dead battery), I decided to install these extra terminals. They allow a jumper battery to be hooked up without actually going to the battery.

Lastly is the trunk expansion kit. The entire lower section of the trunk was expanded down to provide additional storage capacity. This kit came from CobraEarl and took a weekend to install. He provided excellent instructions in the form of a Power Point presentation. I simply took the lap top computer out to the garage and flipped thru the presentation (with lots of pictures.) Getting my work to look like his vivid photos made the task fun!

This view is from the front looking back. We see the backside of the remote battery terminals. The homemade battery box can be seen a little better.

And, finally, with the floors sitting (not fastened yet) in place. This gives a better idea what the finished trunk will look like.


Installing the Radiator


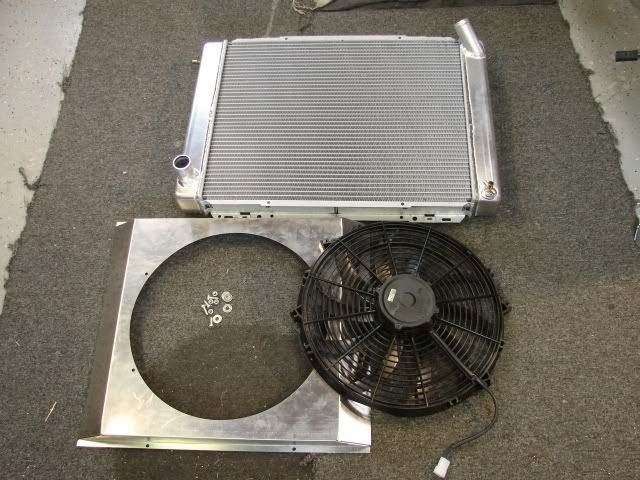
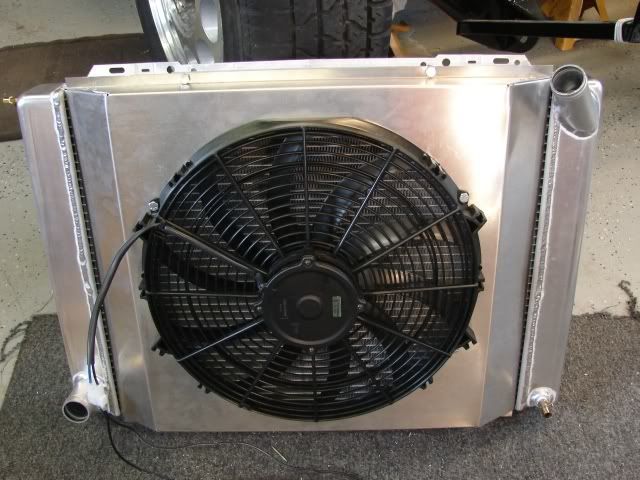
This weekend I installed the radiator. The radiator is all alluminum, made by Afco. The fan shroud is a custom alluminum piece made by So Cal. The fan was included with the Factory Five kit. With a little drilling and tweaking the pieces went together smoothly.


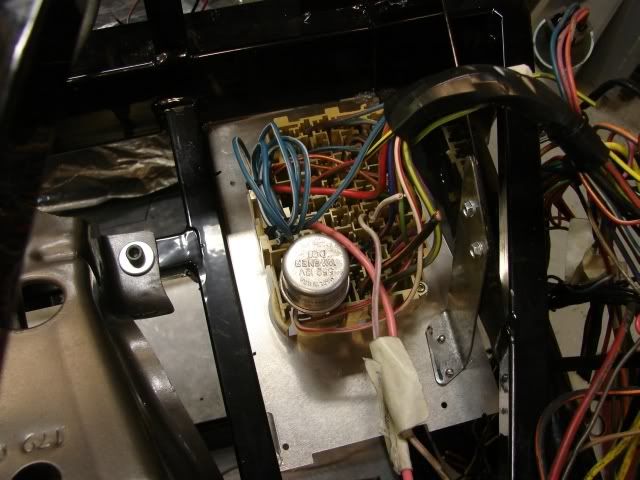
I also started work on the wiring. First step is to install the fuse box. Its located above the drivers left knee, above the clutch pedal. Pretty much everything goes out from this point. Some of those wires, like the pink one with masking tape, aren't going to used initially. That pink one was for the power windows on the Mustang. Never know when I might need power for a circuit added later.


Monday, February 11, 2008

Building Up the Engine

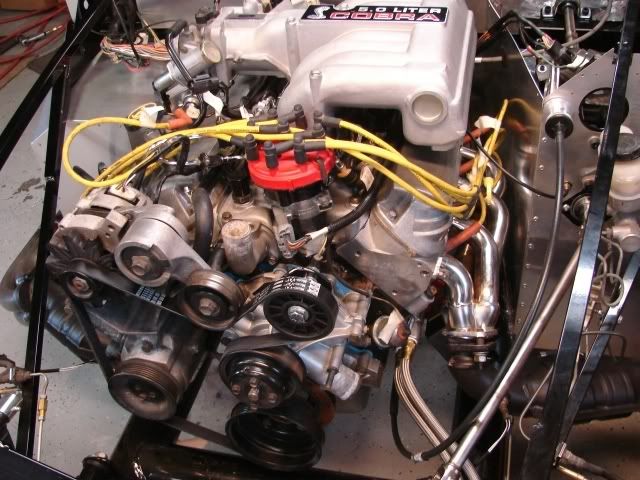
Above, the engine is starting to come together. You can see the accessories on the front of the engine have been installed along with the intake manifold. I installed the accelerator cable and clutch cables this week. Hopefully first start will be 1st week of March.
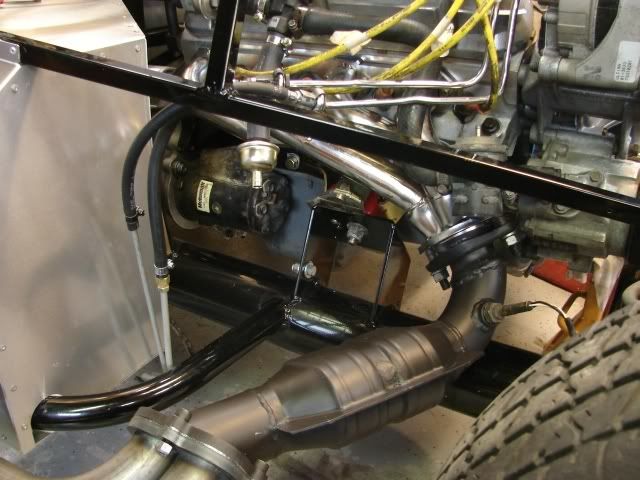
Here you can see I bent the chrome fuel lines so they will go on top of the exhaust instead of behind it like on the Mustang. You can also see the freshly painted catalytic converter. I used VHT white primer then Rustoleum BBQ Grill flat black on the cats. We'll see if it holds up.

I'm trying to mock up the exhaust system. I will try to paint the mufflers before the first start - just seeing what it will look like here - where will the mount bolts go.


Sunday, February 3, 2008

Installing the Engine


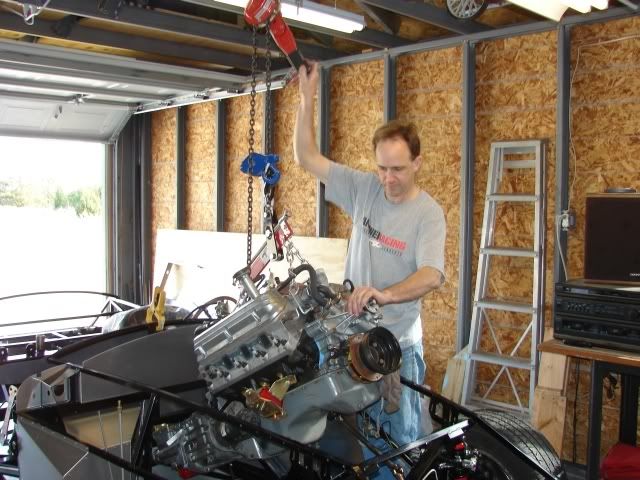
It took Kym and I about 30 minutes to put the engine/transmission assembly into the frame. Actually one of the easiest jobs so far. Having a steel frame garage came in handy. We rigged up a chain winch to the ceiling joists and cranked away. The car easily rolled up under the engine then the engine settled right into it's mount. Wow!
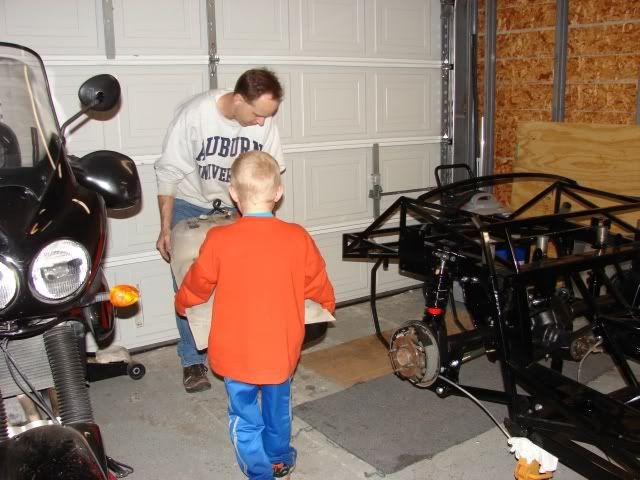
Kym is under the car securing the transmission mount bolts. I think she really enjoyed helping with this step.

Monday, December 24, 2007

Fuel Tank Installation

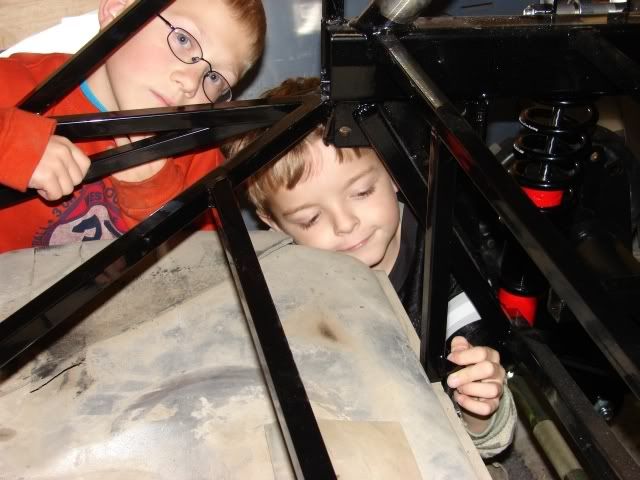
My son Josey and his friend Thad helped me install the gas tank. It was a good opportunity for young helpers.
Thad helps carry the tank to the back of the car.


Thad will help hold the tank up while Josey installs the bolts.
Josey figures out this thing will go together before trying it for real.
Two buddies help each other out.
Then on to the front suspension and steering rack...

Thursday, December 13, 2007

Installing the Rear Differential

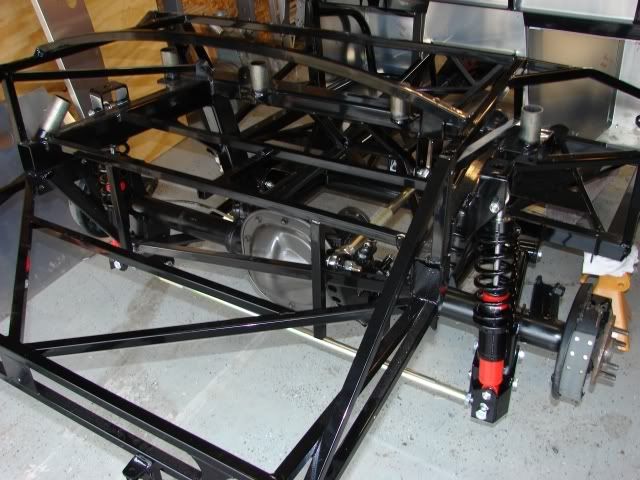
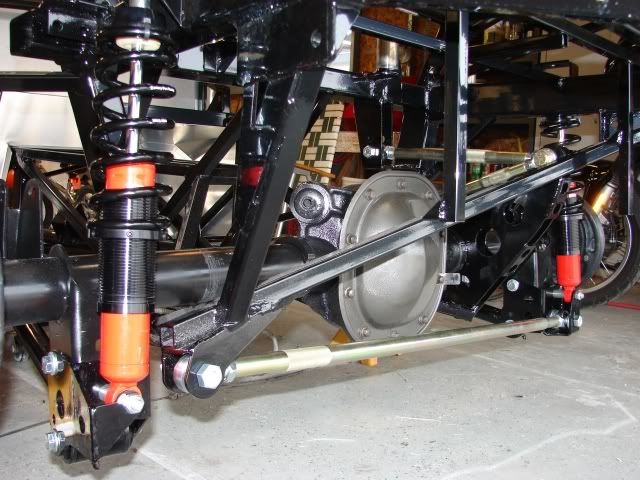
The first parts we installed were rear suspension and drive components.

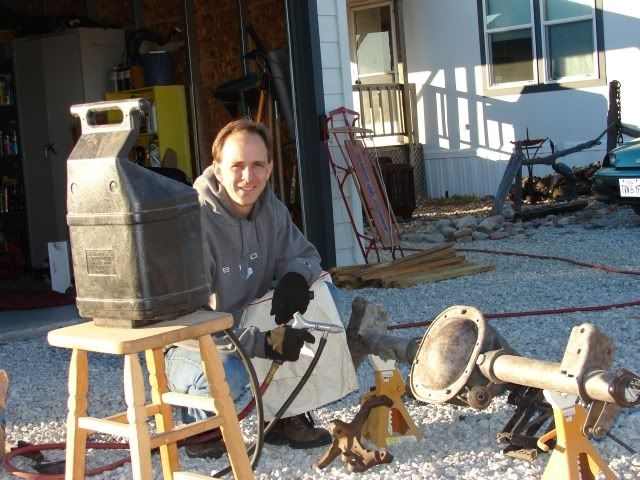
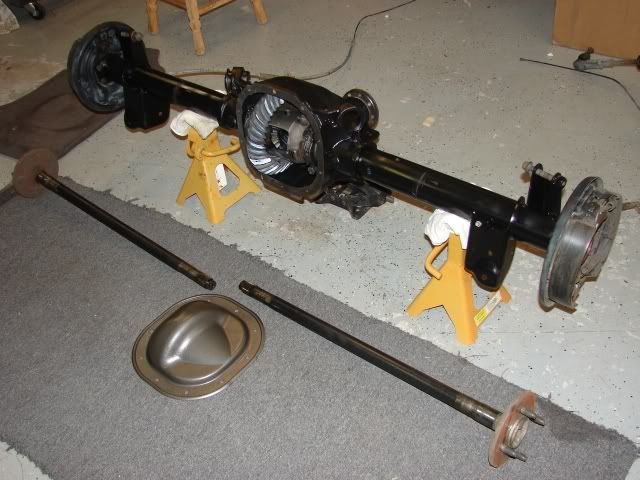
Before installing the differential we took it apart and sandblasted it. Then we waited for a warm day to spray paint it glossy black with the best Rustoleum money can buy.


Then we replaced the stock 2.73 gears with Ford Motorsport 3.27 gears. This will help us accellerate faster but will give us a higher cruising RPM. The penalty for quicker accelleration will be increased fuel consumption.


We installed new brake shoes and cylinders while they were apart. Later we will put new drums on.

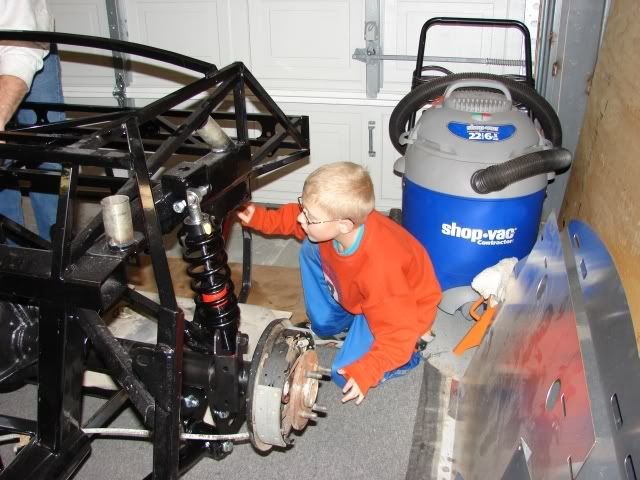
It took 2-3 hours to install the differential along with the suspension gear. Those are Koni coil-over shocks. This suspension set-up is called a 3 Link.


That shiny bar at the bottom fixes the differential from being able to move sie-to-side while cornering. The bar is adjustable to center the rear wheels behind the front wheels. It's called a Pan Hard bar; I don't know why.

Monday, December 3, 2007

"What will your Cobra look like?"

Unlike production cars (Ford, Honda, BMW), kit cars all look different; no two are alike. Each builder creates their own interpretation of what a sports car should be. Some builders prefer a classic look (close to the originals), while other people like a modern feel with up-to-date paint colors and big 17" wheels.

This is an original 1965 427 Cobra. Notice the roll bar only protects the driver - also, it is kind of small tube, spindly. The seats are low-back, they don't go above the body of the car. This provides no protection to the occupants neck or head. The color on this car is Guardsman Blue, right out of the Ford catalog for 1965. It is not considered a "modern" color choice.


This is a kit car. Notice it has two roll bars. The roll bars have a bigger diameter to better protect the occupants. Also, the seats are high-backs; they offer protection to the neck and head in the event of a rear end collision. These things were not available in 1965 making the car look a bit more modern. The wheels on this car look similar to the originals (both use a 15" diameter.) The body paint choice is Guardsman Blue, like many of the originals, indicating the owner still likes the look of the original cars but with modern safety features.

This is also a kit car. The red is a modern (or up-to-date) shade and the shiny reflections indicate a clear coat that was not available in the 1960s. The dual roll bars also give it away as a kit car. What I wanted to point out on this car, though, is the modern wheels. They are a big 17" wheels, unavailable in the sixtys. The tires for these 17 inch wheels are able to handle much better than the 15 inch tires making the car feel more like a modern sports car. The 17, 18, and 19 inch wheels may handle better and look cool, but for me, "it just ain't right."


Here is an example of the dash layout on an original 427 Cobra. The guages are British made Smiths. Typical for 1965 are the black face with little white numbers and little white needle. These guages were functional but difficult to read while driving. They were poorly lit making them almost useless at night. Notice the walnut steering wheel and shifter knob; classy touches for an expensive sports car.


For contrast, the owner of this kit used creativity to assemble a cockpit better suited to his own taste. The digital, white face guages are usually easier to read, especially at night. And that steering wheel may not look classy but it is much more comfortable; the wheel is thicker and soft, making it easier to grip. You might notice the high-back seats as well.


"What will your Cobra look like?" Well, the short answer is, "I don't know yet." I tend to like the classic 1965 look. I believe mine will be Guardsman Blue with no stripes. Low back seats and a single, driver only, roll bar. Look for 15 inch wheels, similar to the originals. (The original wheels are super expensive requiring many modifications to the kit to make them work.) In short, I haven't even decided where I'm going to locate the battery yet so I can't really say what the finished car will look like. You'll just have to keep an eye on this blog to find out!

Today I'm sandblasting the rear differential getting ready to paint it and put it back together with different gears. We should have the suspension hung on the car in about one month. That is the first major assembly step.


Sunday, December 2, 2007

Donor Tear Down


We started out with a 1989 Mustang LX with the 5.0 litre engine and 5 speed transmission. The body and interior were rough, the engine had a miss, the radiator leaked and 2nd gear didn't even work - so, we were able to buy it for less than $1000. Over the next two years we rebuilt the engine and transmission while also saving up for the cobra kit.
I'm lucky to have a friendly neighbor with a Kubota! Kubota mows the back yard, it moves dirt, it pulls engines. Is there anything it can't do? So far we've used that tractor to pull and install the engine twice. After rebuilding the engine I put it back in the Mustang to test it. Now the engine is sitting on a make-shift engine stand waiting to be installed in the Cobra. (Pictures of the finished engine to come later.)
Stripping the interior was necessary to access the wiring harness which will be used in the Cobra. This was a fun step. Its not very often I get to pull so many screws and bolts without paying attention to how this thing goes back together. This car will never go back together! It is being transformed into a different car.
The carcass is now being used to store parts. Some of that stuff, like the gas tank will be used on the Cobra. Other parts like the leaky radiator will go away with the carsass one day.
"How do you get rid of that thing?", you ask. Well, I'm not sure yet. As cheap as possible, I'm sure.


Friday, November 30, 2007

Introduction

Its finally here! After more than two years of planning, saving and waiting, the car has finally arrived. On a rainy Sunday afternoon our neighbors helped us take delivery of this Factory Five MkIII Roadster Coupe. It is a replica of the 1965 427 Cobra built by Carroll Shelby.


The delivery truck had a built in hoist that lowered the kit onto my neighbors trailer. I am on the left, my friend Jonathon is on the right.


Our boys found it very exciting. On the left is Thad then my son Josey on the right. In the middle is Jo, she helps Dennis drive the truck; very friendly people.


After a short drive we backed the trailer into my garage, hoisted the kit up then lowered it onto 2 four-wheel furniture dollies (we changed the plan and pulled the fence posts out shortly after taking this picture.)
Next step was to take the body off and store it for a while. The next steps will involve installing the suspension. Stay tuned...